If you have chosen to set up payments for receiving online payments from your patients, for using your online healthcare services via the Virtual Practice. You can receive online payments by setting up the PayPal Checkout gateway and integrating it with your Virtual Practice account.
How do I integrate PayPal Checkout with my Virtual Practice account?To integrate the PayPal Checkout gateway, you will need a “Client ID” and “Secret Key” which is generated from your payment gateway account. To obtain the Client ID and Secret Key, please follow the steps given below:
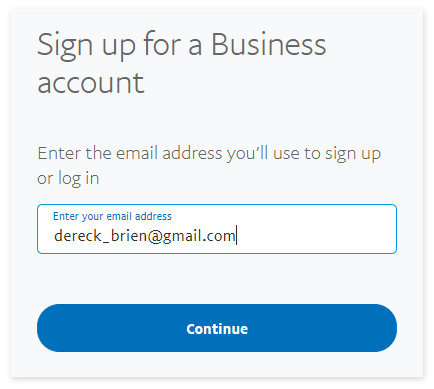
- To integrate PayPal Checkout gateway to your Virtual Practice, you will first need to have a PayPal Business account set up. To create your account, go to https://www.paypal.com/bizsignup/#/checkAccount. If you already have a PayPal account, proceed to the next step.
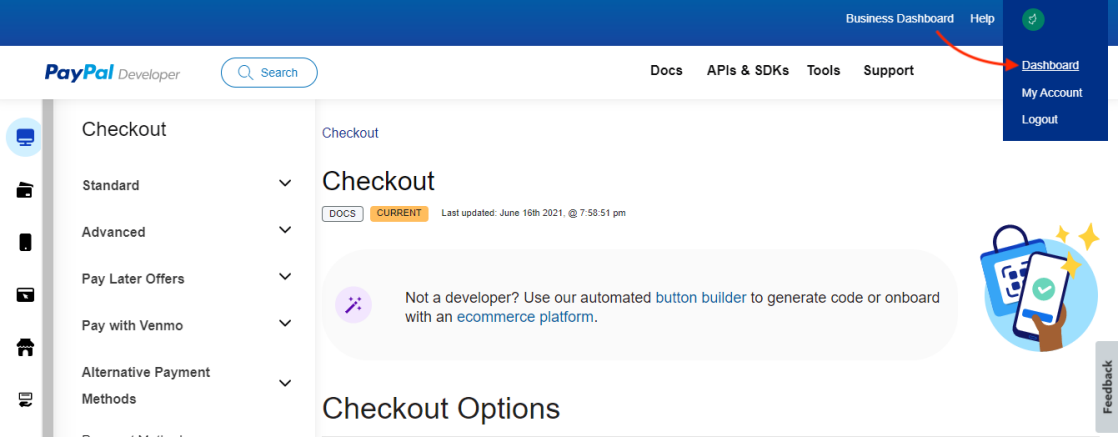
- After you have successfully registered with PayPal, login to the PayPal account and click on the Developer link to open the developer portal of PayPal. You may click on the Dashboard link under the top right-hand side menu to open the Developer dashboard.
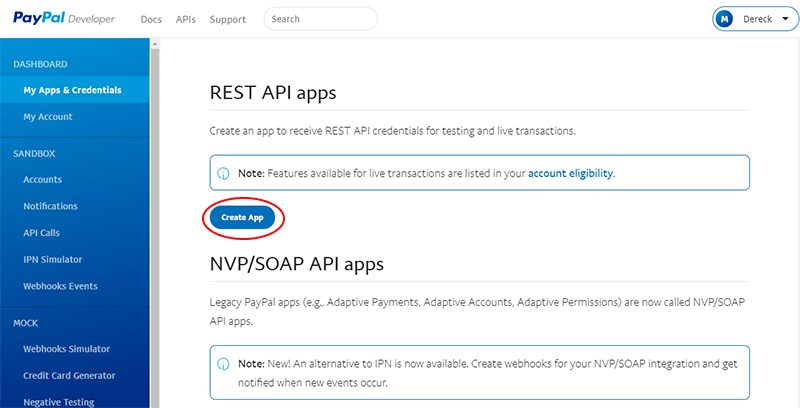
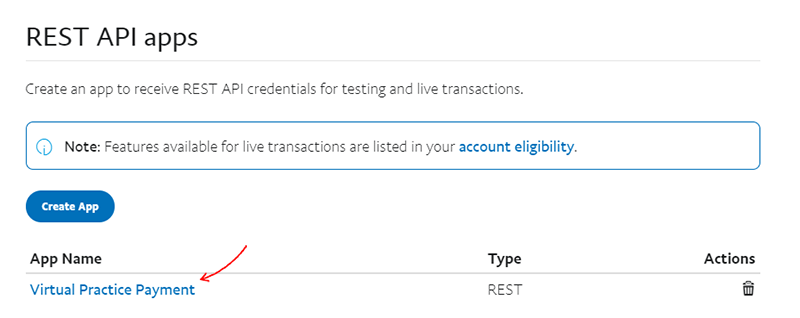
- From the Developer dashboard, go to the REST API apps section under the My Apps & Credentials, and click on“Create App”. This is required to generate your Client ID and Secret Key.
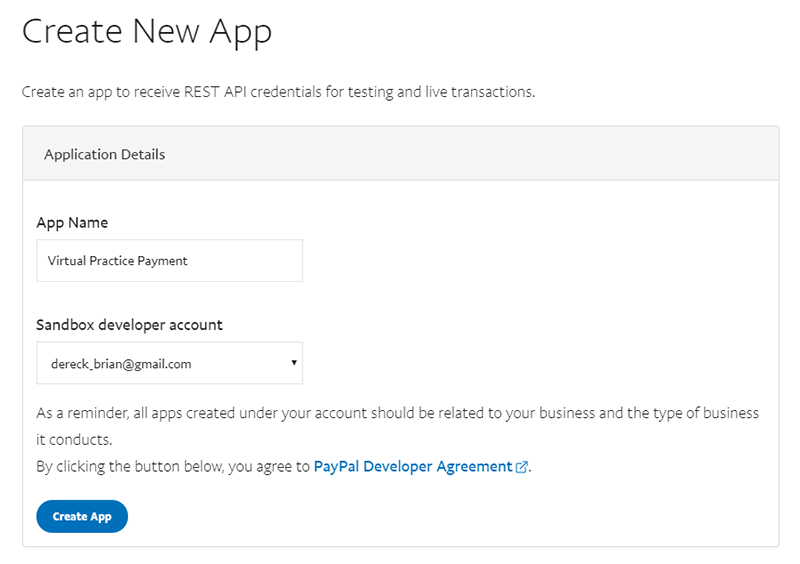
- Enter a name for the API App, e.g. Virtual Practice Payment, and click on ‘Create App’
- The newly created will now appear on the list of API Apps that you have created in your PayPal account.
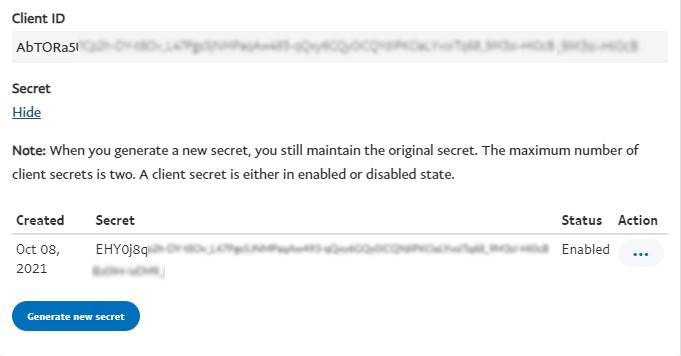
- Click on the App name to view the details. Make sure you have selected the Live option to obtain the app’s Client ID and Secret Key. Copy the Client ID and Secret Key shown, and keep it ready to be integrated in your Virtual Practice.
- Note: Make sure to copy the Live credentials and not the Sandbox credentials, as this would deter proper payment functions.
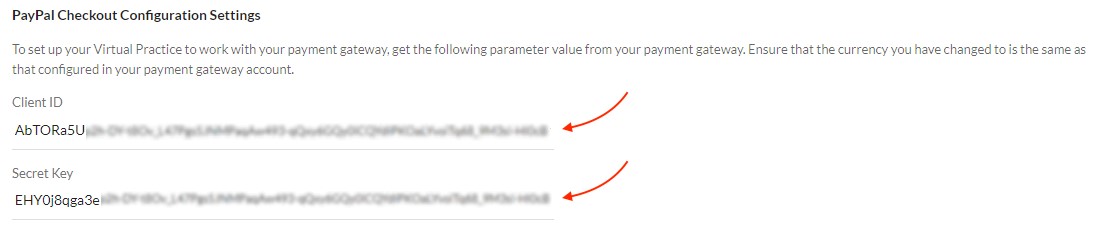
- Next, log in to your Virtual Practice using the Primary User Account and go to Payment Settings screen (under Settings menu option). Choose PayPal Checkout as your preferred Payment Gateway from under Payment Service Settings. Enter the Live Client ID and Secret Key, obtained from your PayPal account, into the corresponding field and click “Save”.
- Note: Ensure that no inadvertent space exists between or after the Client ID and Secret Key, while pasting it.
Update your PayPal Checkout account to communicate with your Virtual Practice.
- To ensure that the correct status of your payment transactions are correctly communicated by PayPal Checkout back to your Virtual Practice, please copy the WebHook URL provided on the PayPal Configuration Settings area of your Virtual Practice Manager and paste it into the WebHook URL setting field in your PayPal Checkout payment gateway account.

- Click on the app name and in the detail view, scroll down to the bottom WebHook. Here the WebHook URL from the Virtual Practice is to be pasted.
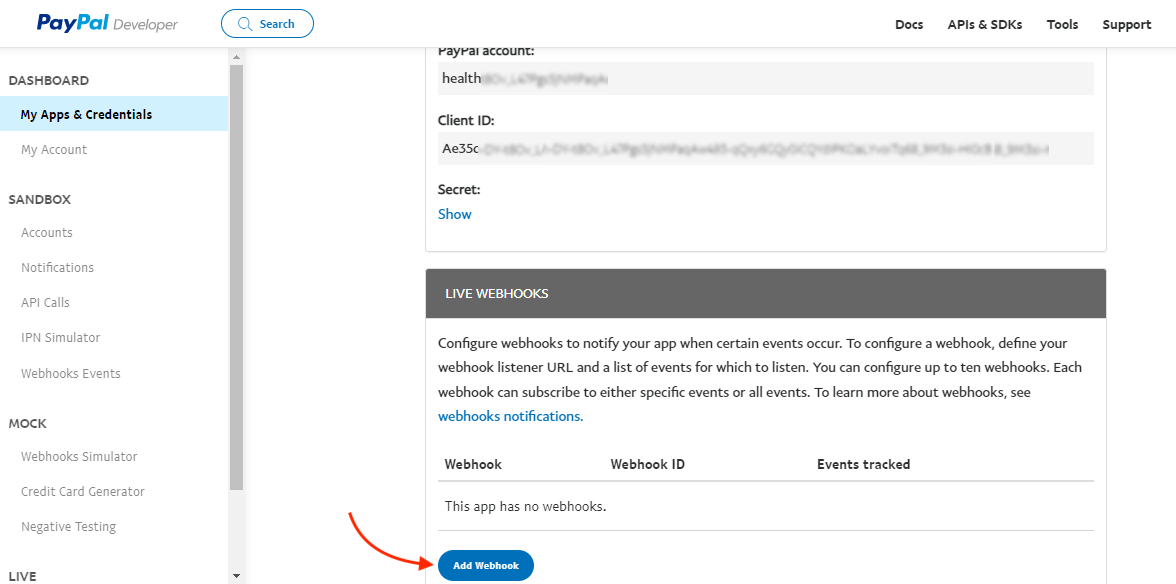
- After pasting the WebHook URL from your Virtual Practice Manager into the PayPal Checkout payment gateway account WebHook URL setting field, select “All Events” as Event Type to save.
Your Virtual Practice is now all set to receive online payments from patients, via PayPal Checkout payment gateway, for using your Virtual Practice services. Patients would be able to pay for your services directly via Credit or Debit card, without the need to create their own PayPal account.
Note: Ensure that the currency that you choose to set for your Virtual Practice is also supported in the PayPal payment gateway and within your country. For more information on PayPal’s support on currencies, please visit their help info page (https://developer.paypal.com/docs/integration/direct/rest/currency-codes/)
If you are having any issues related to the PayPal payment gateway integration, please contact us at support@continuouscare.io