The Patient Import feature is helpful for administrators of the Virtual Practice to add a large number of patient records in one go. This feature adds basic patient records with the minimal set of details collected during registration or when adding a patient. To make things easy we have created a Patient List template as a .csv file. All you have to do is to download the file template, fill in the details following the exact instructions mentioned in the template and then upload the file for import.
You can now import the basic details of the patients into the Virtual Practice by following the below mentioned simple steps:
1. Log in as the Primary Account Owner or as an Admin to the Virtual Practice.
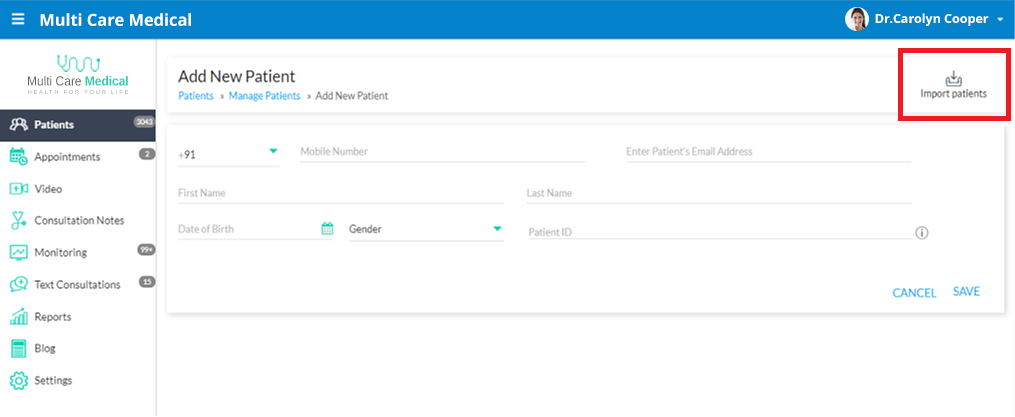
2. Go to the Patients section of the Virtual Practice, click on Add Patient and then click on ‘Import Patients’.
3. Download the Patient List File Template by clicking on the down arrow button.
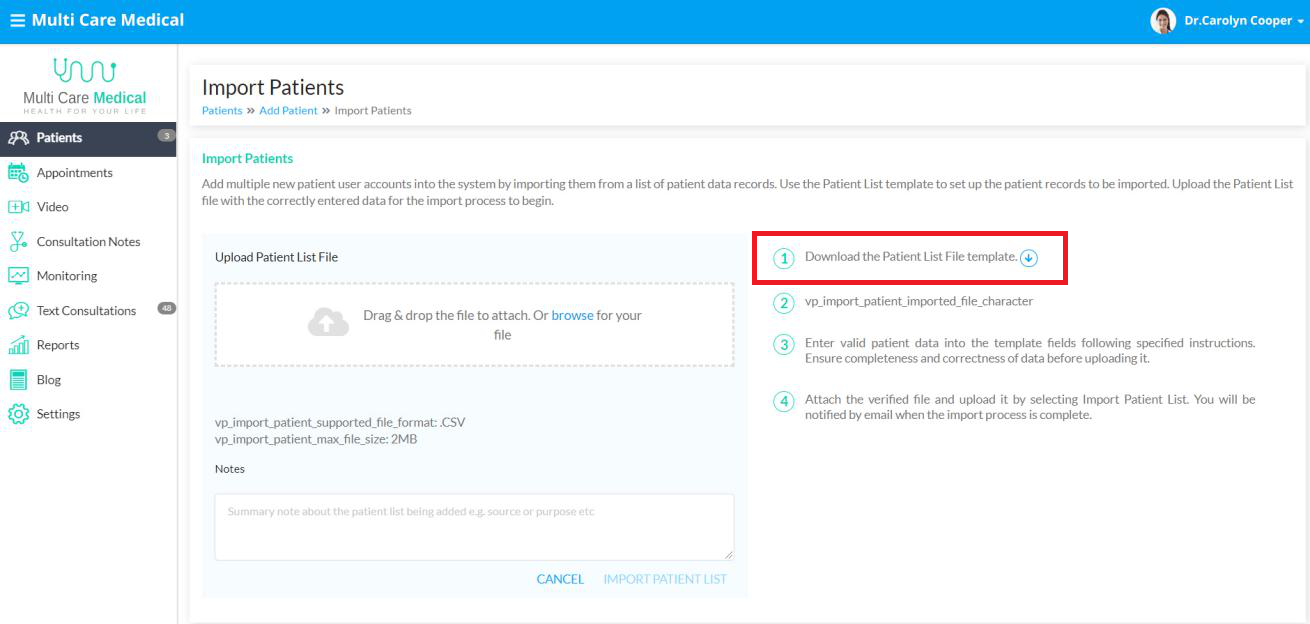
4. Enter valid Patient data into the template fields by following the specified instructions mentioned in the downloaded CSV file. It is very important that the data entered in the file is correct and complete. Please ensure that you verify this before uploading the file. See the instructions at the bottom of this page. Also note that any user account data in the uploaded file which overlaps user accounts of Patients who already exist in the Virtual Practice, will be ignored.
Please note that a maximum of 1000 records could be imported at a time.
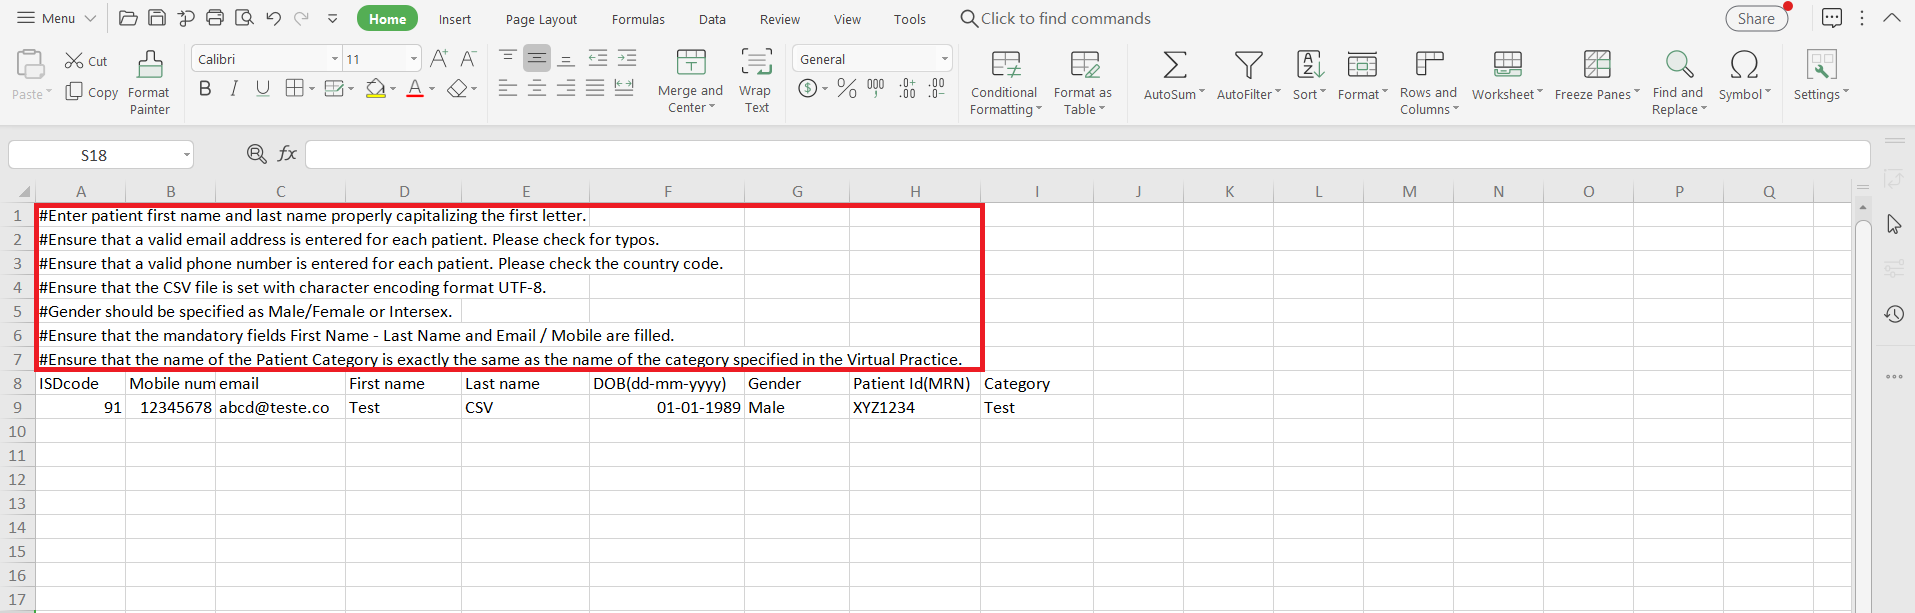
General instructions to be followed while modifying the CSV file:
- Ensure that the first letter of the First Name and Last Name of the Patient is capitalized.
- Make sure that a valid email address is entered for each patient.
- Ensure that the phone number and country code of the patient is valid. Note: Please make sure that if the patient does not have a phone number, then both the country code as well as the phone number fields should be left empty.
- Either the phone number or the email ID of the patient is mandatory i.e., if the patient does not have an email ID then the phone number is mandatory and vice versa.
- Assure that the name of the Patient Category entered is exactly the same as the name of the category specified in the Virtual Practice. You will be able to enter a new Patient Category by giving a new Patient Category in the CSV file.
- Confirm that the Patient Category is separated by a semicolon (;) if there exists more than one Category for a patient.
- Ensure that the file is saved as a UTF-8 encoded CSV file.
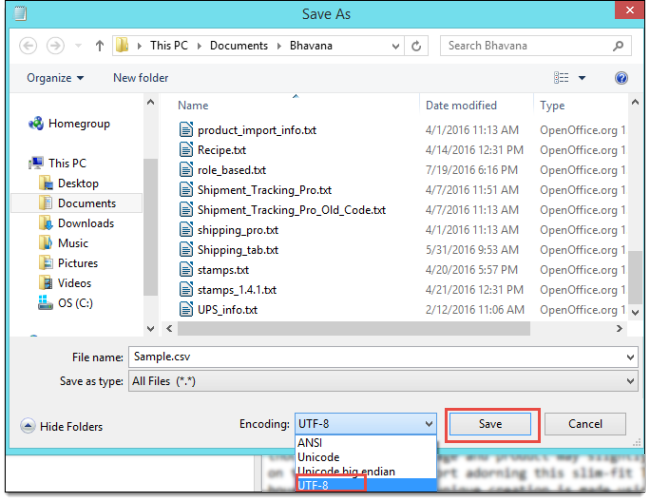
For the files that are not saved in UTF 8 format, please follow the below-mentioned steps and save the file as UTF-8 encoded:
- Open the CSV file with Notepad
- Navigate to File > Save As option
- Next, select the location to the file. The Save As window appears
- Select the Save as type option as All Files (*.*)
- Specify the file name with .csv extension
- From Encoding drop-down list, select UTF-8 option
- Click Save
5. After rechecking the patient data, attach the file and upload the modified CSV file.
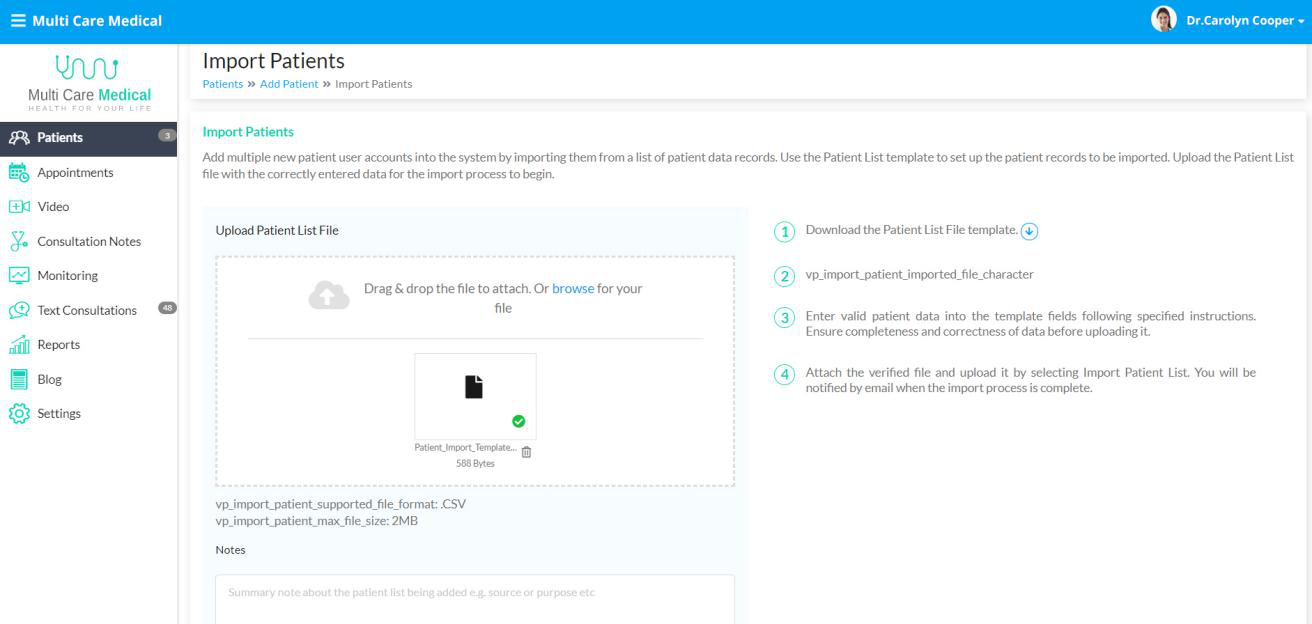
6. For future reference, you can add a note about the Patient List being imported e.g. whether they were patients from a referral source, or patients who registered with you through another system etc.
7. On clicking ‘Import Patient List’, the import process will start in the background.
Following are the general statuses of Patient Import:
- Queued for Processing- File has been successfully uploaded and queued for import
- Import process in progress– File has started the actual import process
- Import Process Terminated By User– Import processing has been terminated
Note: By clicking on the delete icon, you will be able to terminate the import and this could be done only for the records which have the status ‘Queued for Processing’.
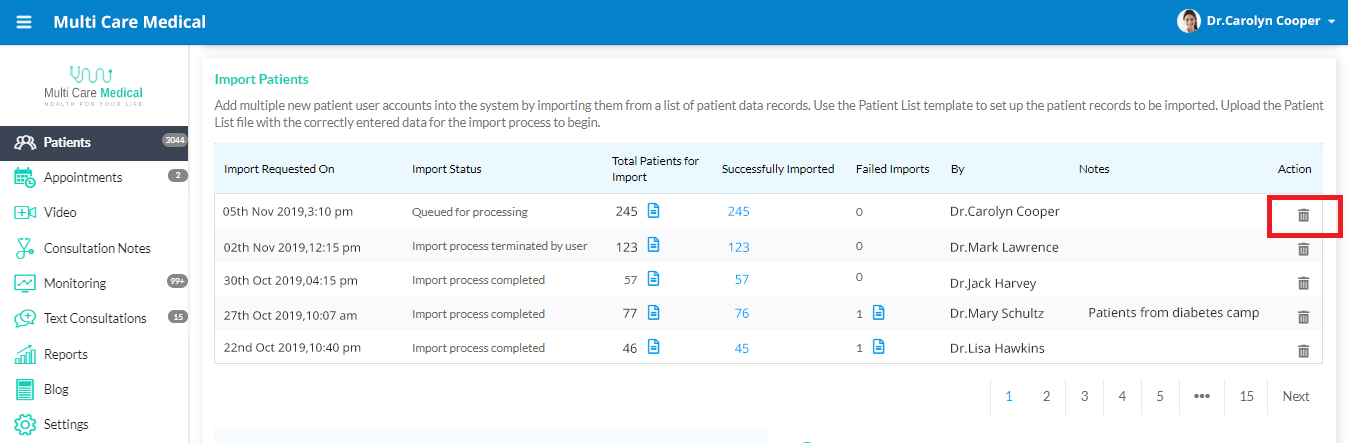
- Import Process Completed– Import processing has been completed on the file
In the Import Patients page, you will be presented with necessary details of the previously done imports such as the date & time, import status, total number of records, the number of successful and failed imports, the name of the Healthcare Provider who had uploaded the files for import and also a brief description of the import.
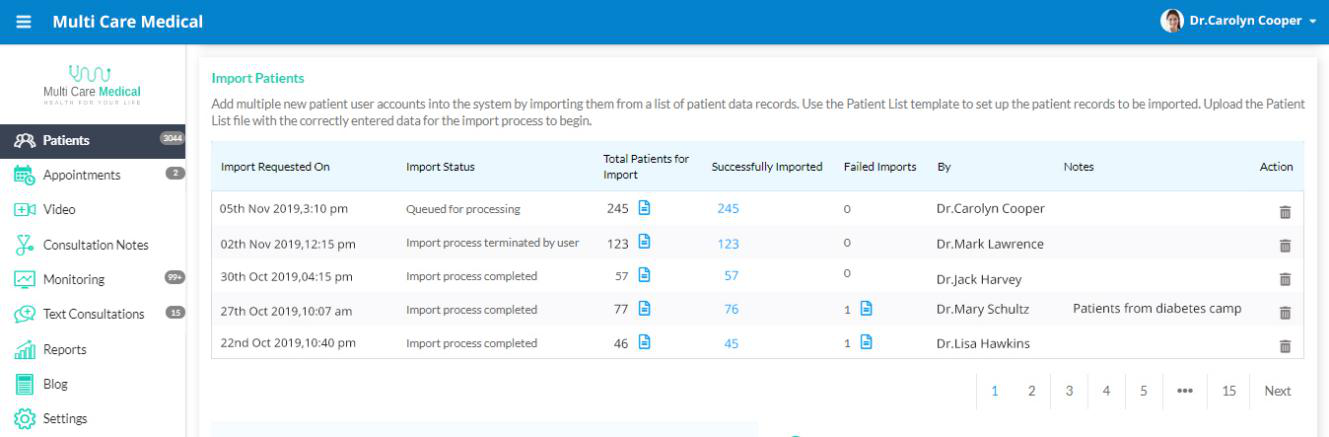
On clicking over the Successfully Imported records, you will be directed to the list of imported patients of that particular import. If you want to view the list of failed records of any particular import, just click over the Failed Imports. You will also be able to download the originally uploaded file by clicking over the Total Patients for Import.
You will also have the option to download the uploaded files and the error report files for a time span of 30 days.
8. Once the import is complete, both the owner of the Import as well as the Primary Account Owner of your Virtual Practice will be notified via email.