Follow the steps below to integrate your Stripe account into your Virtual Practice.
Step 1: Get Your ID keys from your Stripe Account
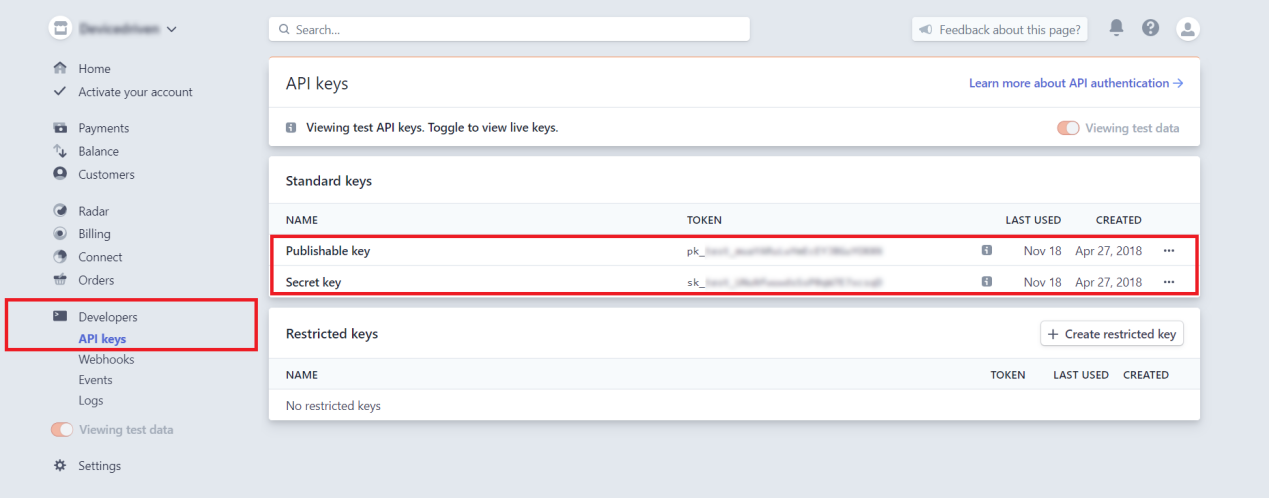
To integrate the Stripe account into your Virtual Practice, you will need a “Publishable Key” and also a “Secret Key” generated from your payment gateway account.
1. Log in to your Stripe account at https://dashboard.stripe.com/login, using your login credentials and then navigate to the Settings option.
2. From the Developers section, click on the “API Keys” tab. Here you can view both the Publishable Key and Secret Key that is required to be integrated into your Stripe account.
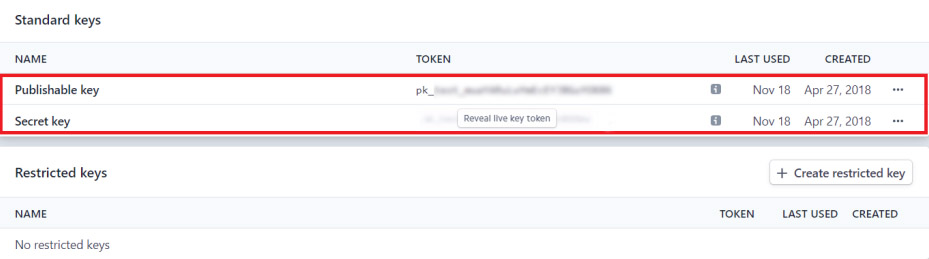
3. Before using the generated Secret key, please ensure to use the toggle switch that says “Viewing test data” and set it to “View live data“.
 You would now be able to view the Live API Keys required to integrate your Stripe account into your Virtual Practice.
Click on ‘Reveal Live key token’ to obtain the Live Secret key.
 Step 2: Setup your Virtual Practice Payment Service to use your Stripe account
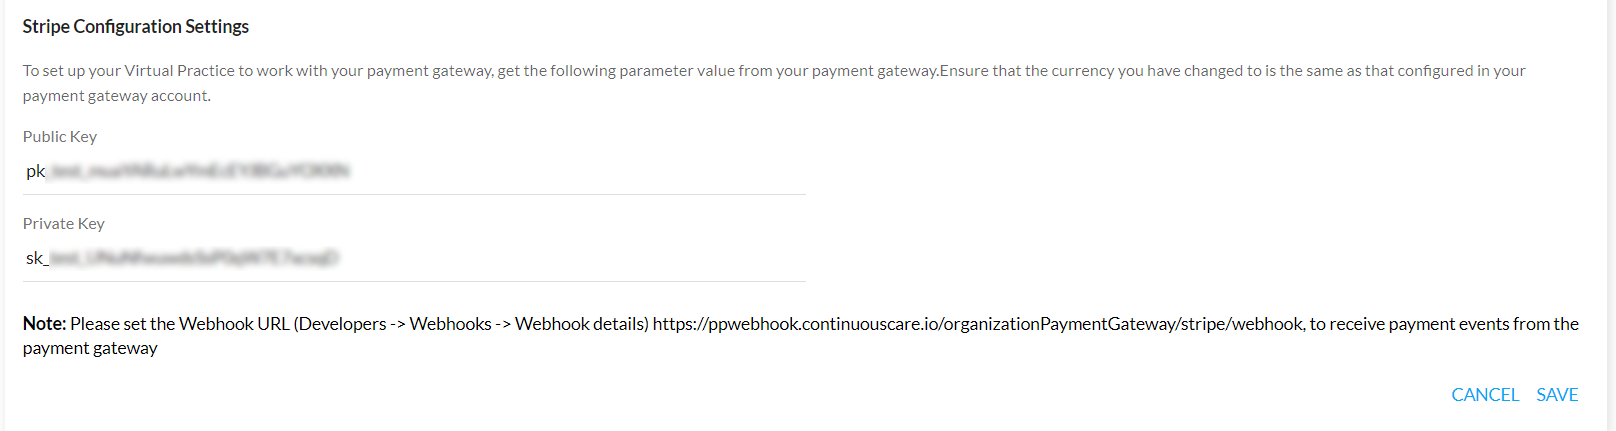
Next, log into your Portal Manager using the Primary User Account and go to the Payment Settings screen (under Settings menu option).
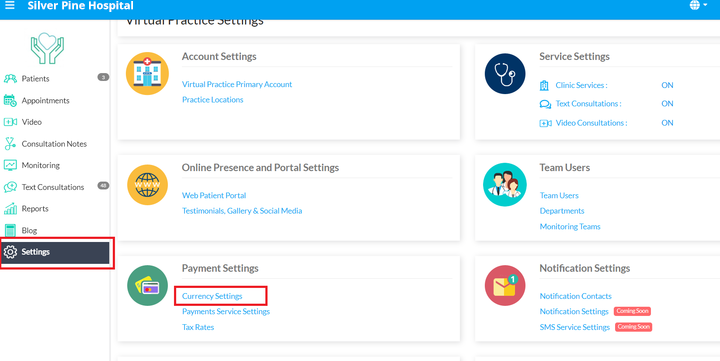 Under the Payment Service Settings, choose Stripe as your Payment Gateway.
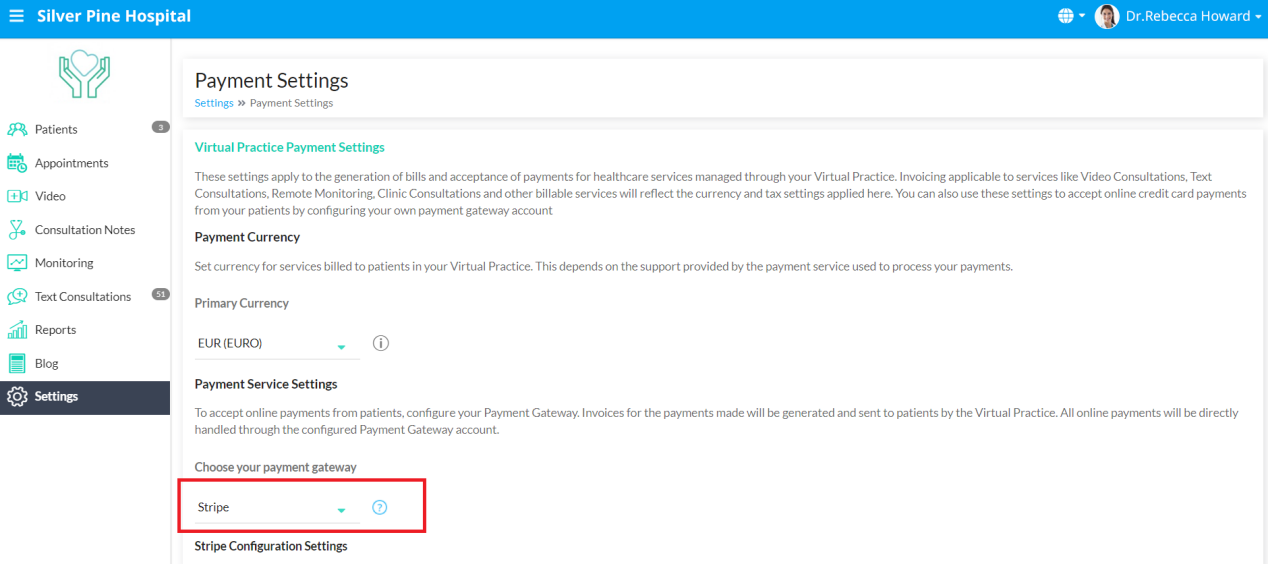 This will bring up the configuration fields needed for integrating your Stripe account. Copy and paste the Live Publishable Key and Secret Key into the respective fields. Verify the entered values and click Save.
Note: While pasting the keys, ensure that inadvertent spaces are not introduced within the keys, as this would deter proper payment functions.
 Step 3: Update your Stripe account to communicate with your Virtual Practice
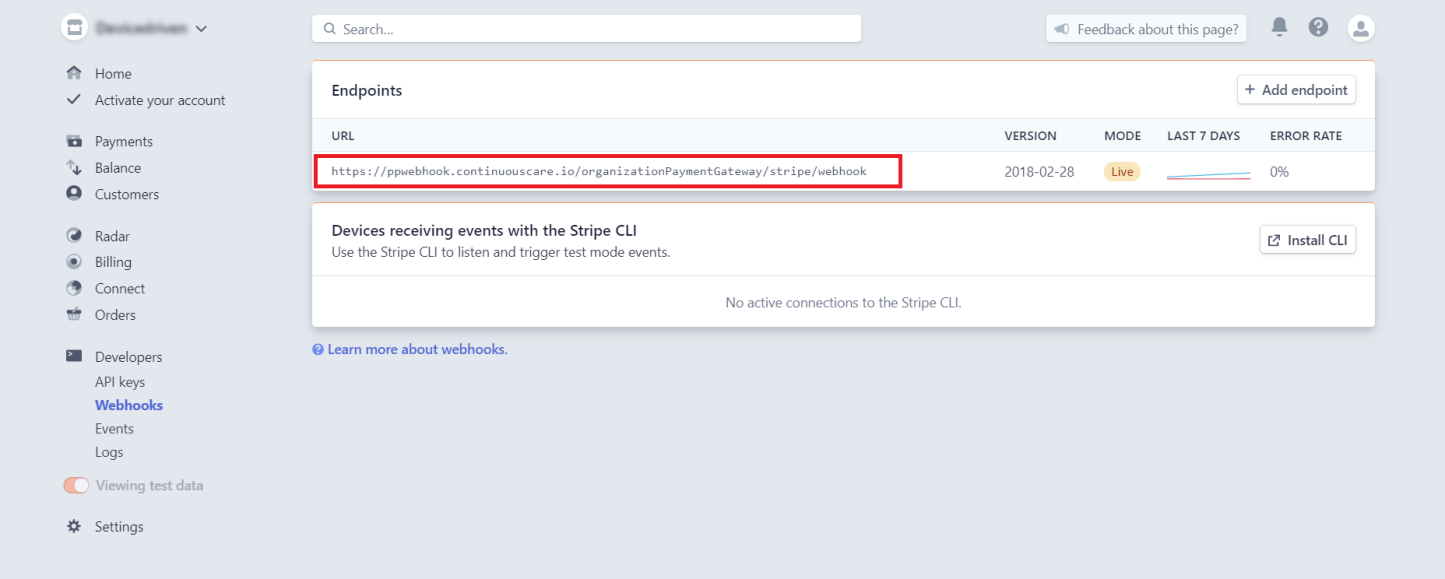
To ensure that the correct status of your payment transactions are correctly communicated by Stripe back to your Virtual Practice, copy the WebHook URL provided on the Stripe Configuration Settings area of your Portal Manager and paste it into the WebHook URL setting field in your Stripe payment gateway account.
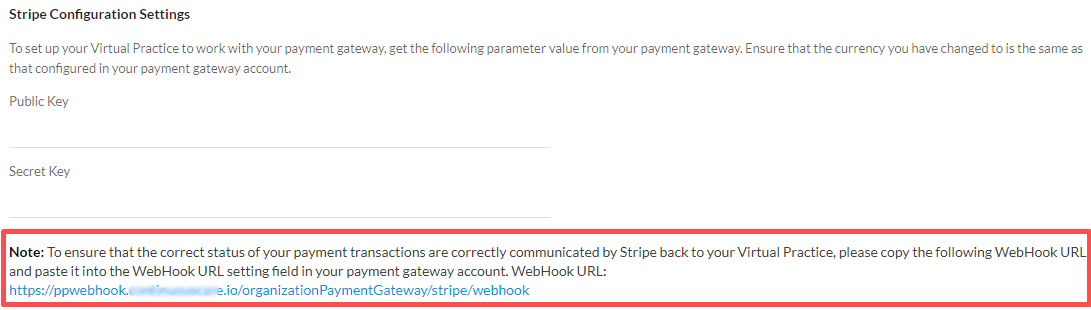
For the ‘Events to send’ setting, the following event types (“payment_intent.processing”, “payment_intent.canceled”, “payment_intent.payment_failed”, “payment_intent.created”, “payment_intent.succeeded” and “charge.succeeded”) need to be selected while the WebHook URL is added.
Note: The secret key to use, is the one generated when you first setup your Stripe account and have saved somewhere securely. The secret key shown in the Stripe interface thereafter is only a dummy key. It is the generated and saved key that should be entered into the payment settings page.
As part of extra fraud protection in the European countries and India, by law, a 3D secure protection is enabled in all the credit/debit cards. 3D Secure requires customers to complete an additional verification step with the card issuer when paying. The customer will be directed to an authentication page on their bank’s website, and they enter a password associated with the card or a code sent to their phone.