Step 1: Get Your ID keys from your RazorPay Account
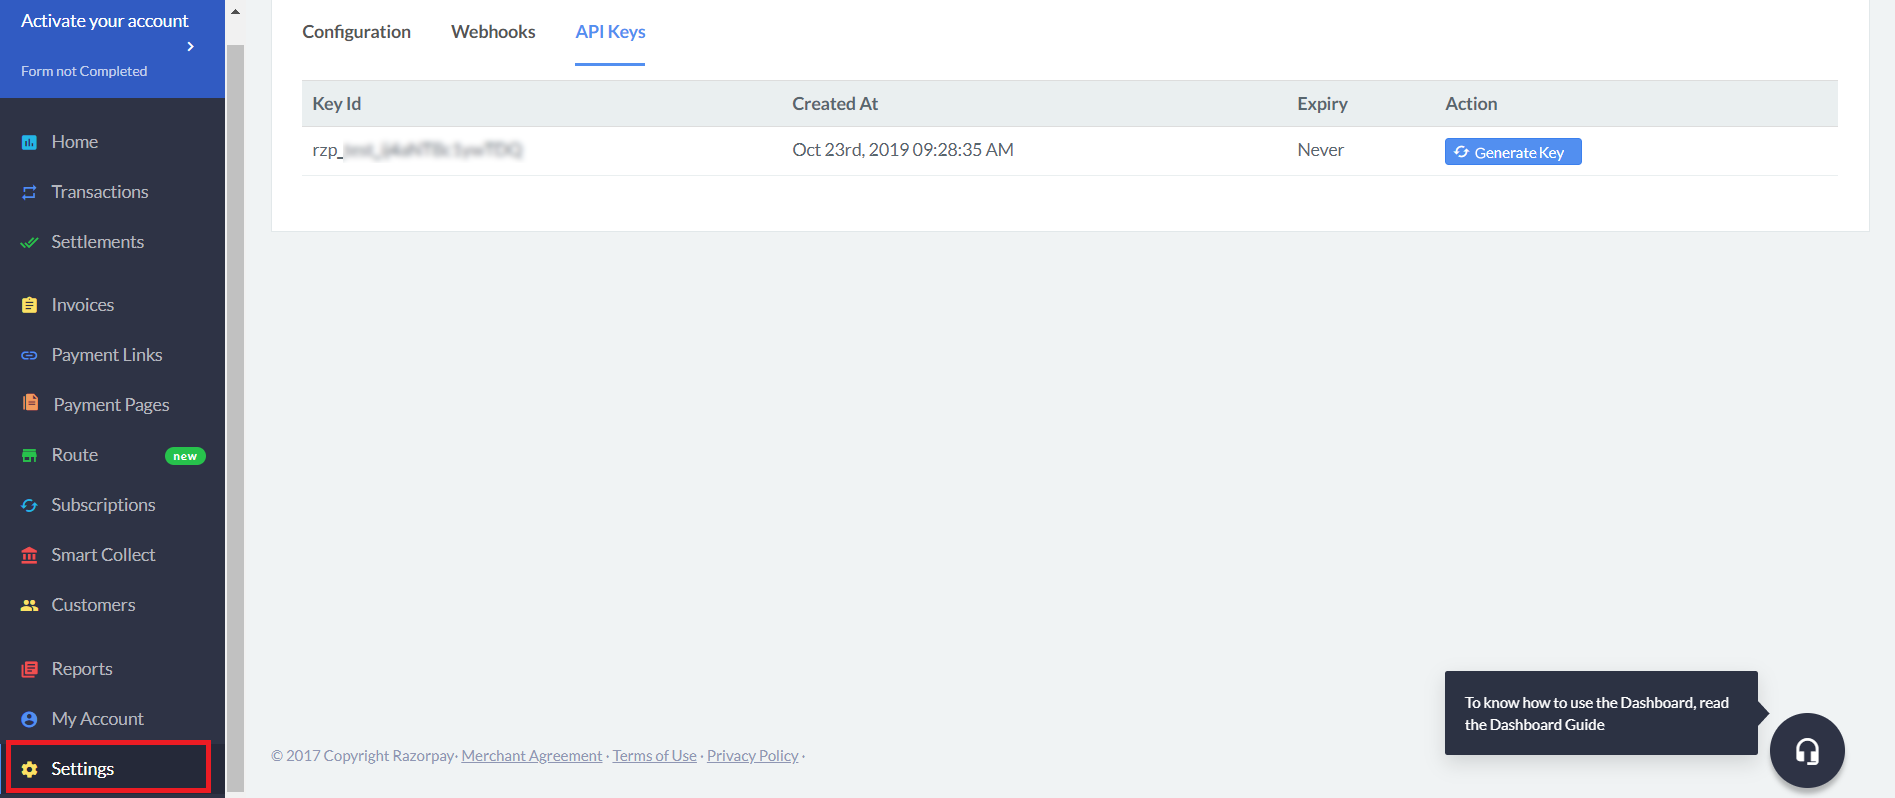
To integrate the RazorPay account into your Virtual Practice, you will need a “Key ID” and also a “Secret Key ID” generated from your payment gateway account. 1. Log in to your RazorPay account at https://razorpay.com/, using your login credentials and then navigate to the Settings option. Note: To receive payments from patients, make sure you have switched from ‘Test‘ to ‘Live‘ mode. You will have to generate API keys in the ‘Live‘ mode. You can switch to the Live mode using the drop-down option at the top of the Dashboard.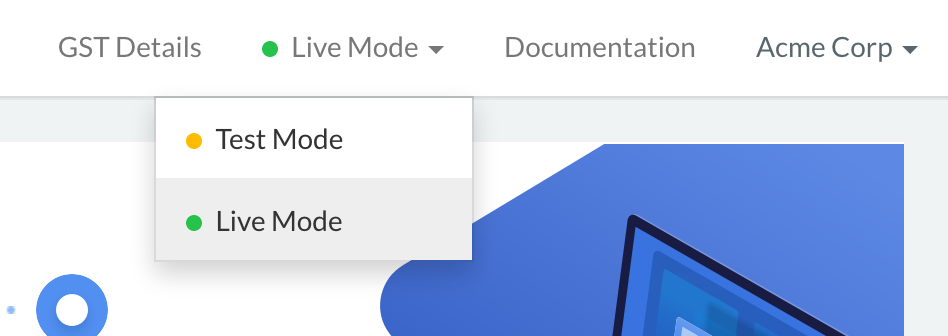 2. Next, click on the “API Keys” tab as shown below. Here you can view the Key ID that is required to be integrated in your RazorPay account.
3. Click on “Generate Key” this would generate a secret key ID and can be downloaded as a .CSV file which you could keep for future reference.
2. Next, click on the “API Keys” tab as shown below. Here you can view the Key ID that is required to be integrated in your RazorPay account.
3. Click on “Generate Key” this would generate a secret key ID and can be downloaded as a .CSV file which you could keep for future reference.
 4. Also, ensure that your business website details ( for e.g., yourpracticename.continuouscare.io) have been added in My Account → Profile → Business Website/App details to receive payments.
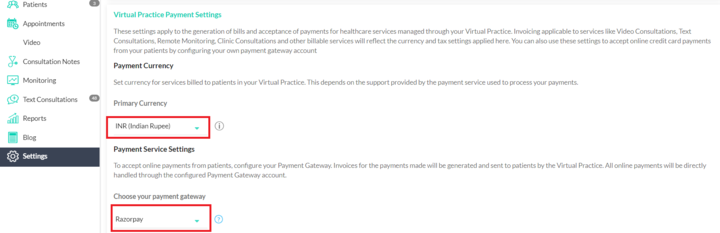
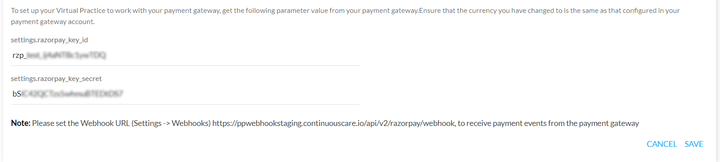
Step 2: Setup your Virtual Practice Payment Service to user your RazorPay account
Next, log into your Virtual Practice using the Primary User Account and go to the Payment Settings screen (under Settings menu option).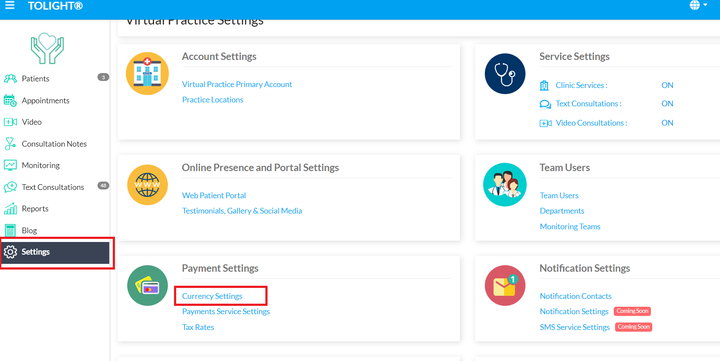
Step 3: Update your RazorPay account to communicate with your Virtual Practice
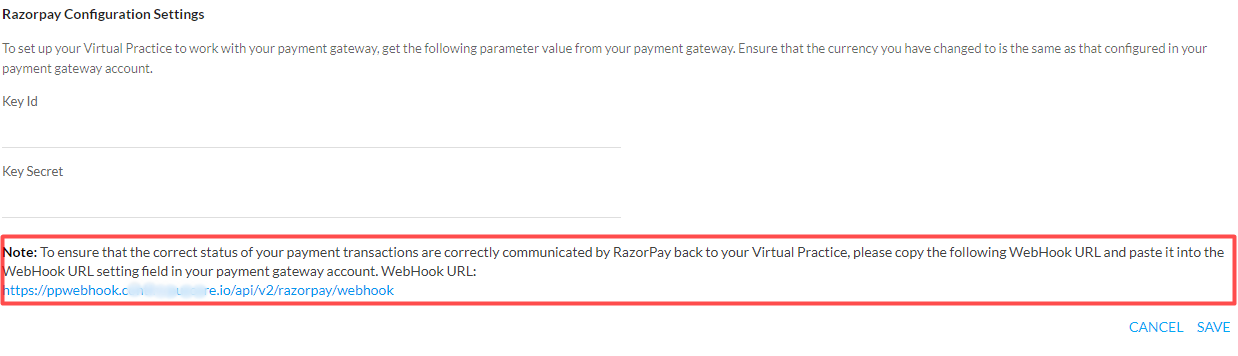 See the screenshot below on how to link the WebHook URL to your RazorPay account
Note: Please note that Razorpay generally requires its customers to include a Refund and Cancellations Policy as well as a Shipping and Delivery Policy in their Terms Page, in line with standard practices observed among Razorpay payment gateway users.
We recommend that you review and update your Patient Terms on Virtual Practice to incorporate these additional clauses, ensuring they align with your specific business operations.
For assistance in updating your Terms Page to comply with these requirements, please feel free to contact our Support Team at support@continuouscare.io.