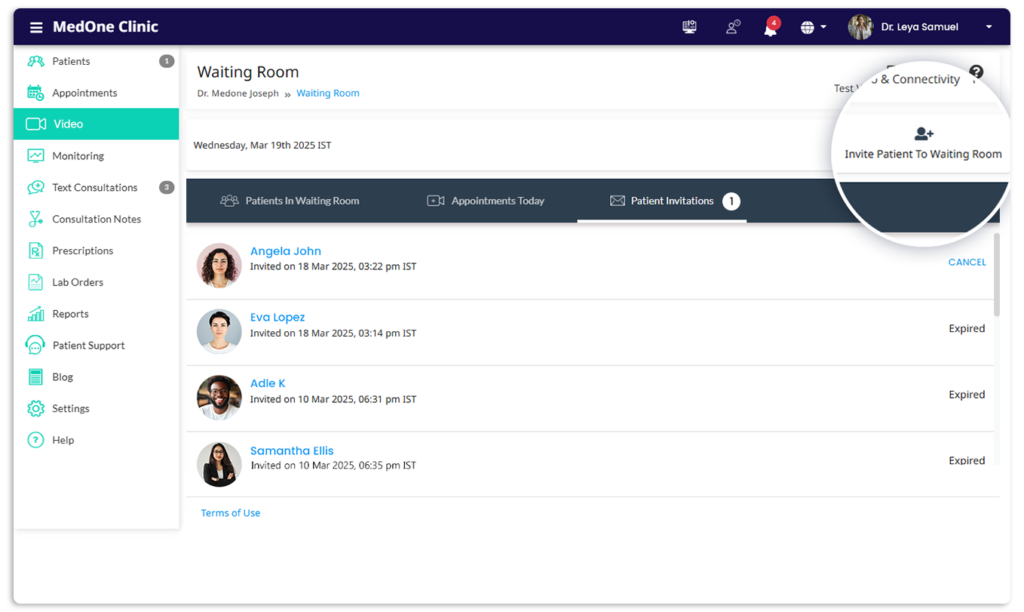
As a healthcare provider, you can access your own online Waiting Room, using the Waiting Room menu option from the header (see arrow in screenshot below). Once you are in your Waiting Room, you can invite a patient to the Waiting Room for an instant Video Consultation, by sending them an invitation.
For the Online Waiting Room feature to be accessible to a specific Healthcare Provider, they need to be enabled to provide Video Consultation Services.
1) Inviting patients to your Waiting Room
Invite registered patients into your waiting room by clicking on Invite Patient to Waiting Room as shown below.
 Invite patient to Waiting Room
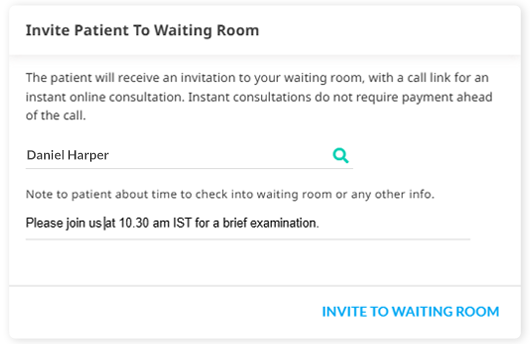
Choose a patient you would like to invite, by typing the patient Name, Email address, ID or Phone number. Add an optional note to the patient, if you would like to specify instructions about the time you would like them to join the call or any other relevant information.
Select patient
On clicking Invite to Waiting Room, an invitation notification would be sent to the patient’s Email address and/or mobile phone number, through which they can enter your waiting room, without the necessity of logging in to their account.
View invitations that you’ve sent out to patients, by clicking Patient Invitations. The number in the bubble indicates the count of currently active invitations that have been sent out to patients. Note that patient invitations expire within 24 hours. You can also choose to cancel patient invitations, if required.
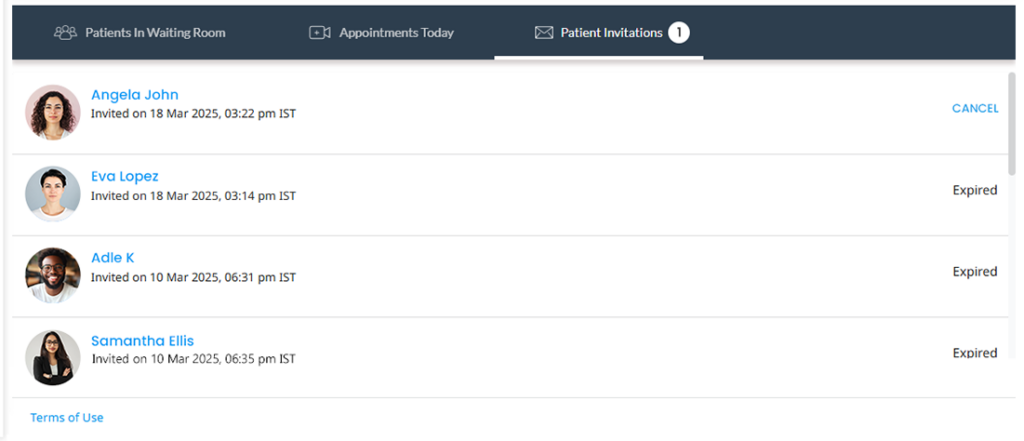
Patient invitations list
2) View Patients in your Waiting Room
On clicking the invitation link, the patient would be directed to the provider’s Waiting Room, where they would be able to see a video preview of themselves and join the call, whenever ready.

Patient view of Waiting Room
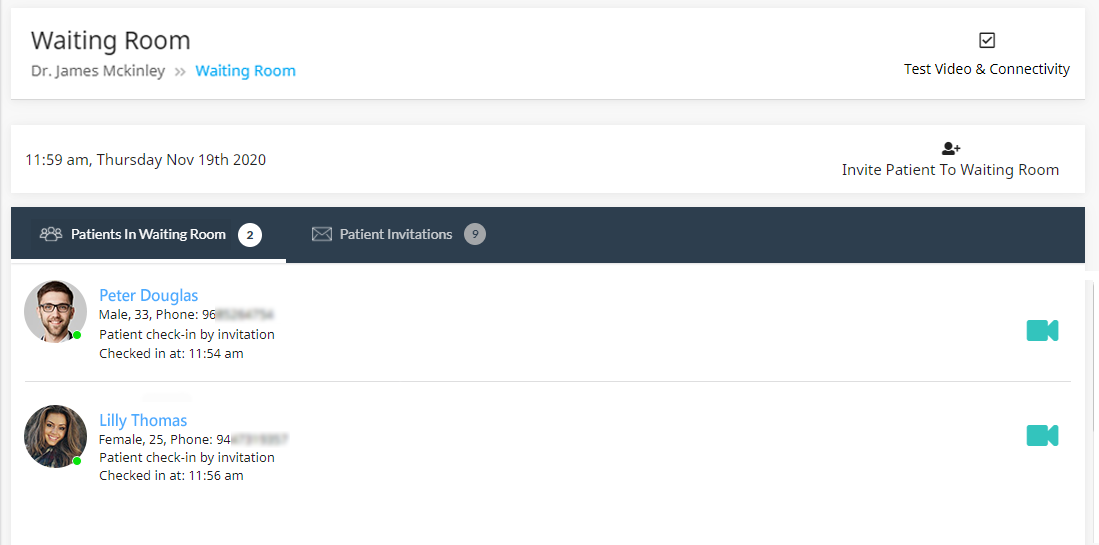
Once the patient clicks Join, they would be checked in to your Waiting Room and would have to wait until they are admitted into the call. Simultaneously, you would receive Email/SMS notifications regarding patient check-in.
You would be able to view queued patients who have checked-in, prioritized by check-in time on clicking the Patients in Waiting Room tab, as shown below. The bubble indicates the number of patients who are currently online and have checked-in to the waiting room.
Patients in Waiting Room
You can also test your video webcam, microphone and network prior to the video consultation session, to ensure uninterrupted sessions with your patients. Make sure you use compatible browsers and OS versions as specified, for smooth functioning of video sessions with patients.

3) Start Video Consultation
Launch the call with a patient who has checked-in, by clicking the video icon indicated below.
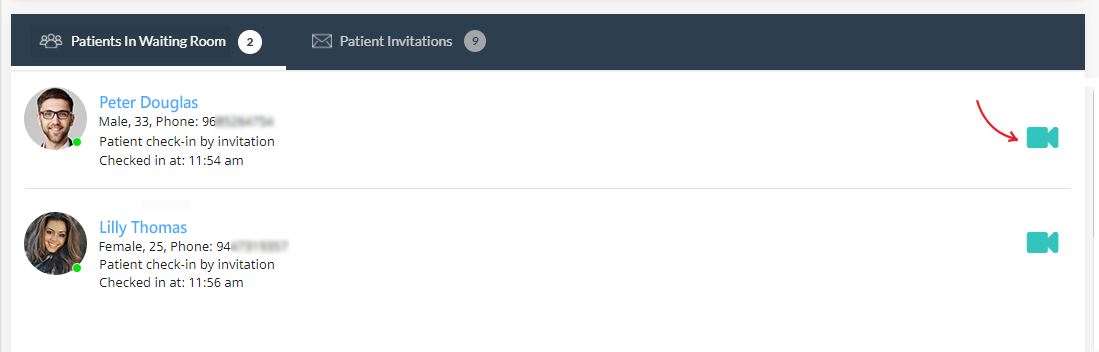
Start Video Call
You would also be able to access other features during the video call such as inviting guest participants, Screen Share, Screen Capture, etc.
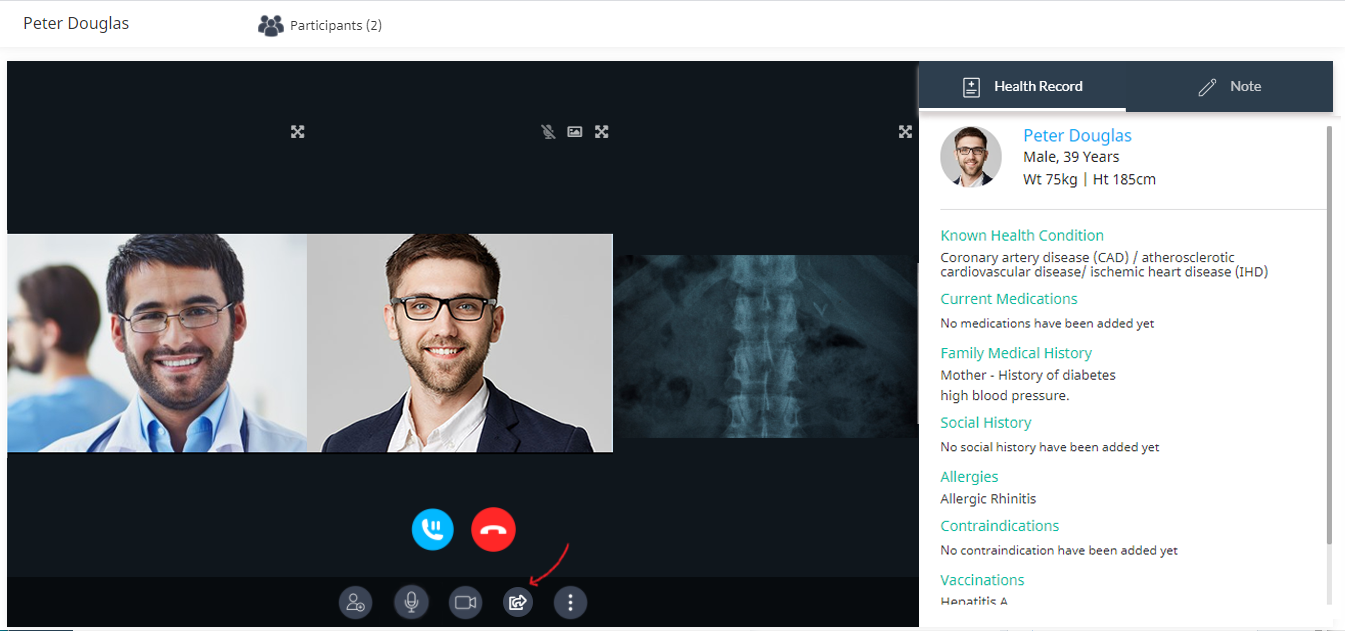
Screen Share feature
During the Video Consultation session, the healthcare provider can use the Note field to capture notes relevant to the consultation. Once the video call session is completed, a draft Consultation Note including these notes is automatically saved. The healthcare provider can finalize these notes, add any relevant prescription for medication or medical tests and save the Consultation Note. The finalized and saved Consultation Note will then be available to the patient to view and download, by logging into their own account in the patient portal.
Once the session has been concluded by the provider, the status of the invitation would change to ‘Concluded’.