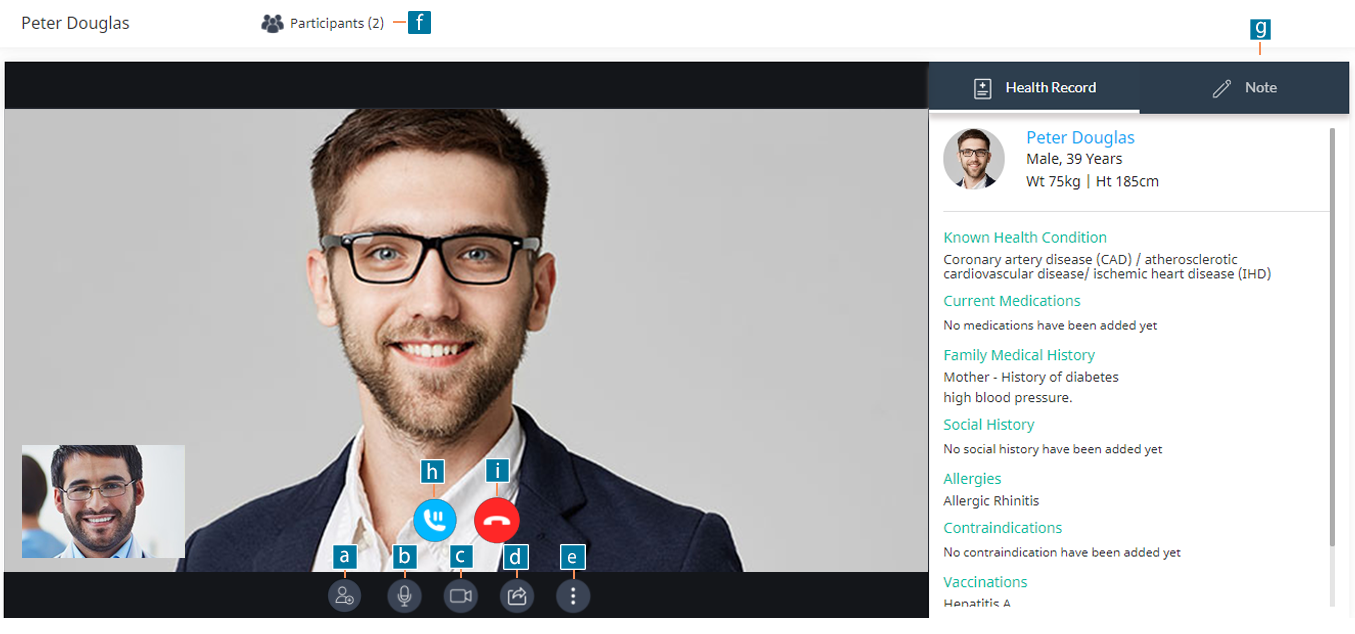
Whether doing a Video Consultation based on an appointment or an instant Video call by inviting a patient to your Waiting Room, during a video consultation session, in addition to being able to see and talk to the patient, you can view a summary of their health profile, share your screen to discuss a medical report with them, do a screen capture, capture notes during the consultation and also use the various settings options.
Video Session Features
Test Video Compatibility
It is advisable to test your video webcam, microphone and network prior to the video consultation session, to ensure uninterrupted sessions with your patients. Make sure you use compatible browsers and OS versions for smooth functioning of video sessions.
Note: Providers should use compatible desktop web browsers when attending a Video Consultation from a PC. To handle a video consultation from the mobile, please use the Virtual Practice application (available on Android and iOS) and not the web app.
Features in a Video Session
You can start the session by clicking the Join Call trigger from the appointment list. You can view patients in the Waiting Room and initiate the video call from there.Once you have started the video session, you can use the following features:
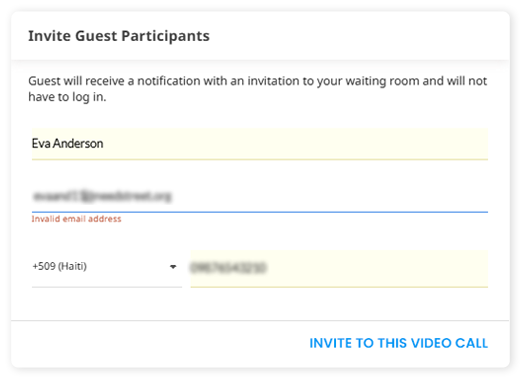
a) Invite Guest participants: Click to invite guest participants into your ongoing patient call. This is particularly useful if you would like to have the patient’s caregiver, translator, etc. in the call. You can also include a colleague or consulting specialist to the call, etc. if required. An invitation link would be sent to the guest participant’s email address and mobile number. Once the participant has checked in, you can admit them into the call.
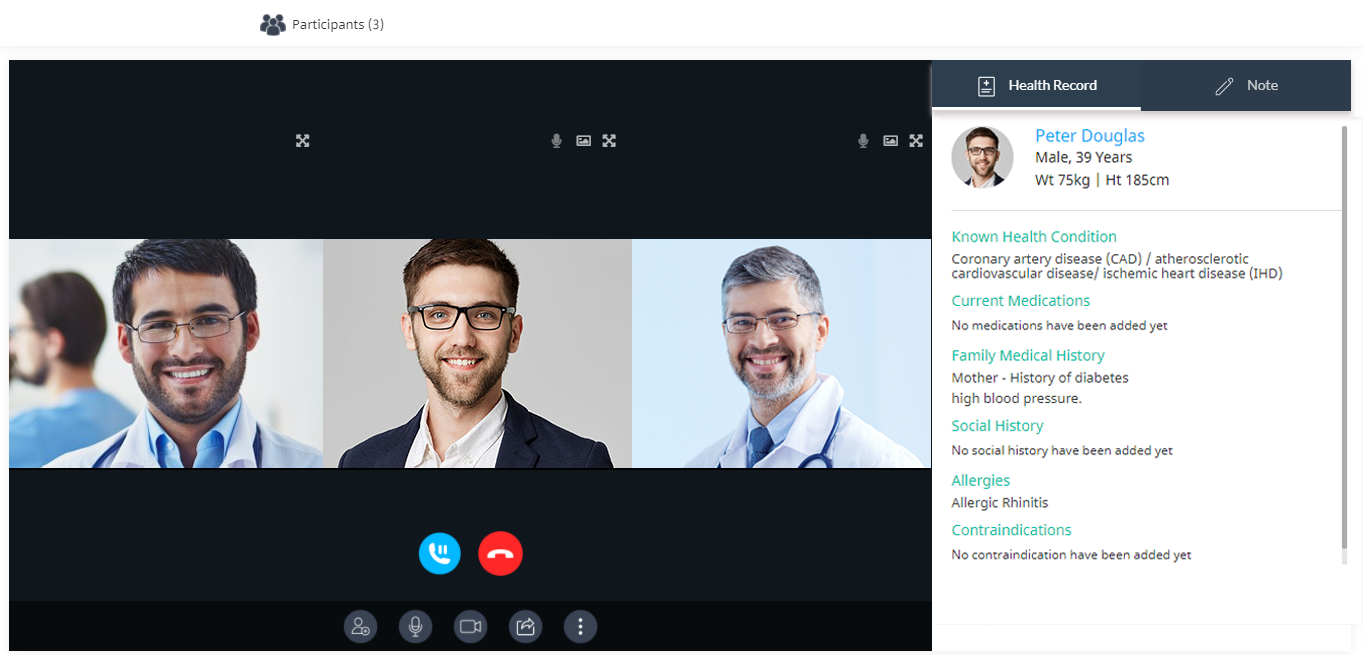
Multi-Participant Video Call
b) Audio: Click the audio icon to turn your microphone on/off.
c) Video: Click the video icon to turn your camera on/off.
d) Screen Share : The screen share feature lets you share relevant information with your patient, like imaging studies, diagnostic test results, etc., for enhanced communication. You can choose to share contents of your entire screen, application window, or browser tab. You would still be able to view the patient’s video stream, while sharing your screen. Click the icon again to stop sharing.
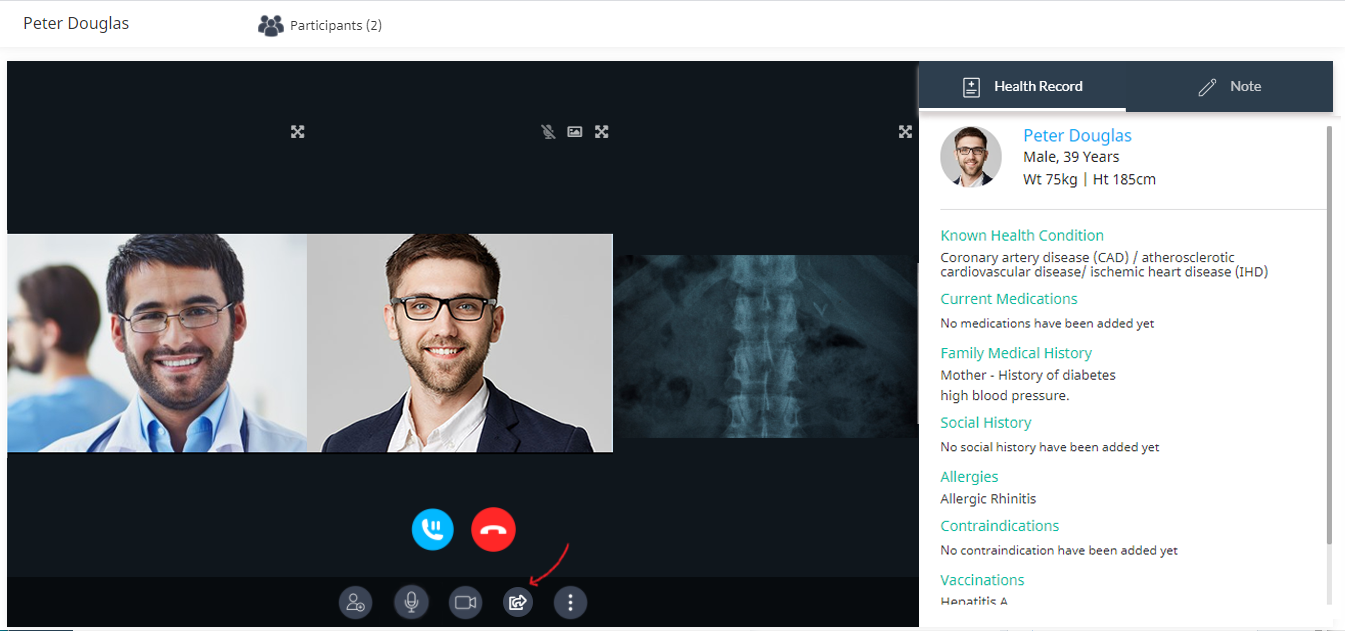
Screen Share

e) Screen Capture: Use the screen capture feature to capture and save patient images during the video call, which may help in diagnosis, treatment analysis, future reference, etc.
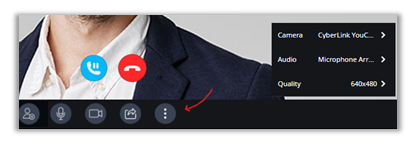
Settings: Lets you choose your preferred camera or audio device. You also get to define the quality of video (low or high definition). The quality of the video call switches itself to high or low, depending on your network. By default, the quality of video is 640×480 (low definition).
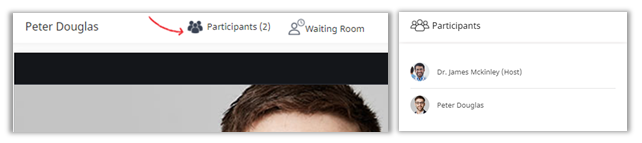
f) Participants: View the list of participants in the ongoing call, by clicking on the Participants button.
View participants
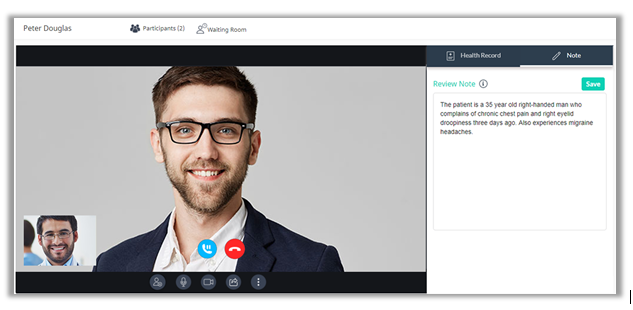
g) Review Note: During the Video Consultation session, the healthcare provider can use the Note field to capture notes relevant to the consultation. Once the video call session is completed, a draft Consultation Note including these notes is automatically saved. The healthcare provider can finalize these notes, add any relevant prescription for medication or medical tests and save the Consultation Note. The finalized and saved Consultation Note will then be available to the patient to view and download, by logging into their own account in the patient portal.
Add Review Note
h) Pause Call: Use the pause button to put the video session on hold. Both the provider and patient video streams would be paused. Click again to resume call.
i) End Call: Click to end the call. Concluding the session would direct you to the corresponding Consultation Note.