The steps below will assist you in setting up Video Consultation services in your Virtual Practice so that Appointments may be Set for or Booked by your patients.
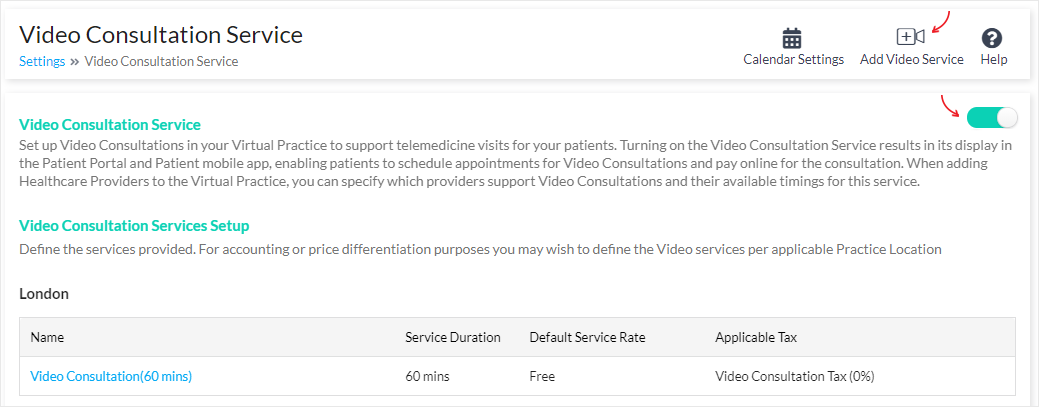 Note: By default, your Portal Manager comes with one default Video Consultation service named ‘Video Consultation’, with a default duration of 15 minutes and no service charge. This is only to help you get started and you may edit this as required.

- Enabling Video Services
Note: By default, your Portal Manager comes with one default Video Consultation service named ‘Video Consultation’, with a default duration of 15 minutes and no service charge. This is only to help you get started and you may edit this as required.
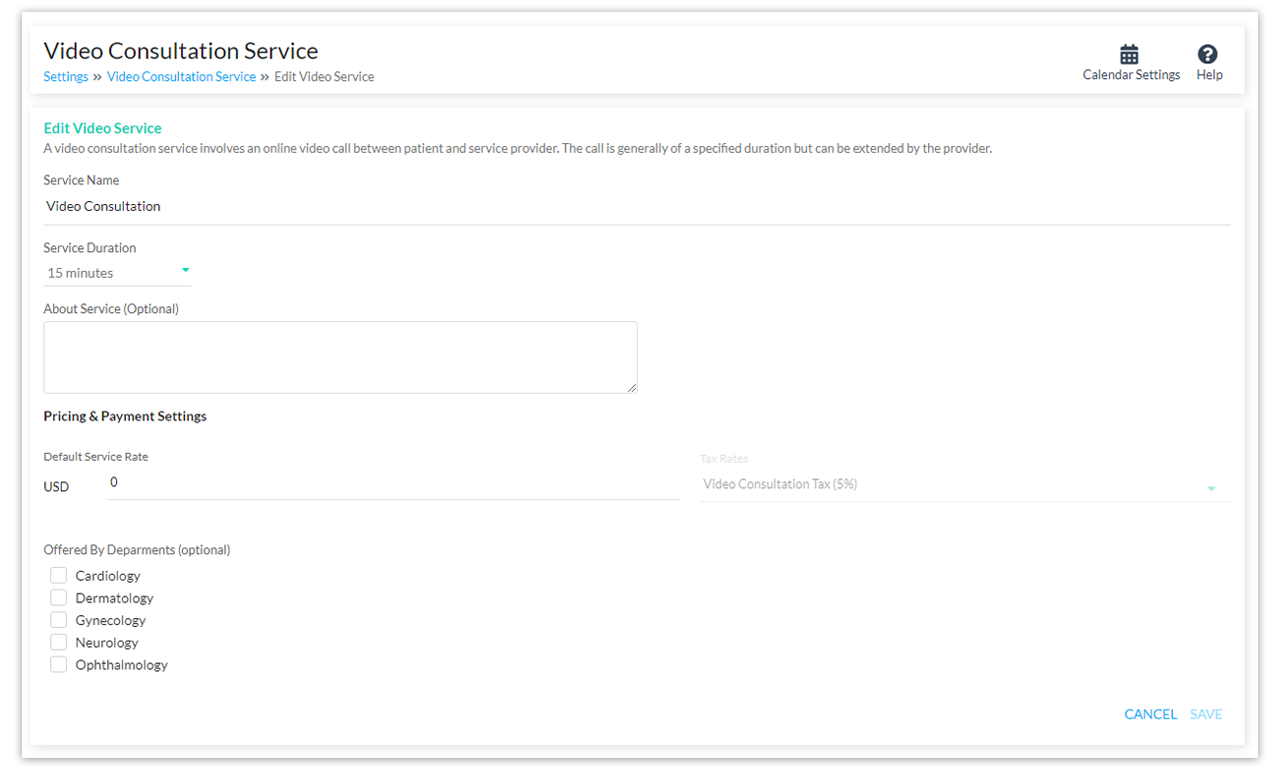
- Adding New Video Consultation Services
- Name of Service: Specify a name that your patients are familiar with or can easily understand e.g. First Time Consultation / Followup Consultation / Counselling Session etc
- Duration: The duration of the service also defines the duration of the appointment that patients will make for the service. e.g. 15min / 30min/ 1 hour etc depending on the needs of the service.
- About the Service (optional): A short description about service might be helpful for patients.
- Available at Practice Locations: Video Consultations being location agnostic, do not need to be mapped to different business locations that you may have. For most organizations, mapping Video Consultations to just one Practice Location works fine, unless you wish to differentiate video services across different locations.
- Service Charge: When setting the service charge, you have the option of specifying, a different charge for the service in each Practice Location where it is available. This is optional and you can apply the same charge across locations. If you have only one Practice Location, then you only have to specify the charge at that location.
- Tax: Applicable taxes if any, can be set by selecting from the taxes you have setup under Payment Settings. Patients booking a clinic consultation with healthcare providers of your team, will have to the pay the amount including tax.
- Departments (optional): If you have defined Departments in your Portal Manager, you can also map the service to one or more departments. This will help patients to find the Video Consultation services offered within a particular department, particularly when they are booking appointments.
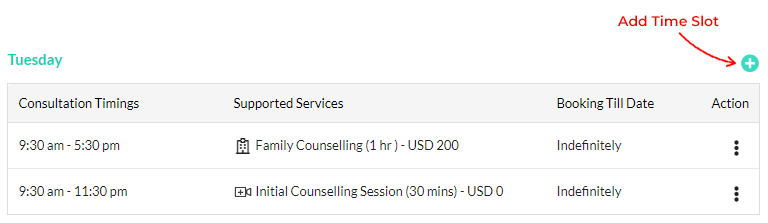
- Enabling Supported Services of a Healthcare Provider
- Setting up a Provider’s Timings
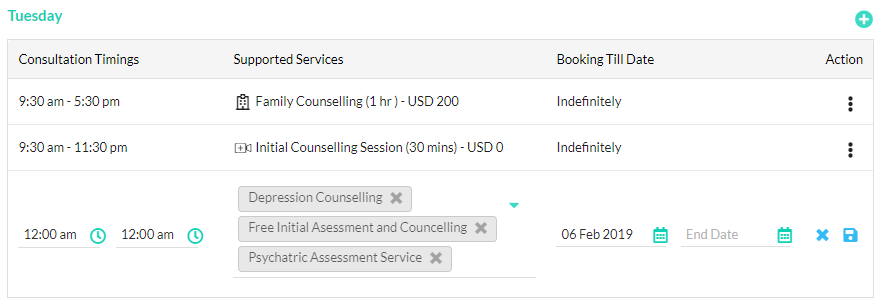
- Start Time and End Time: Timing duration of the slot
- Services: Choose one or more services that the Provider offers during this time slot.
- Applicable Date Range: Normally timings are specified as being applicable indefinitely. If however, the Provider supports these timings only within a specific date range (e.g. the Provider might only be available for the next 2 months), that can be specified by specifying the dates.Once you have set up a Provider’s timings and also the services offered during those timings, patients will be able to view this information and book these services during the specified timings. Also, the Provider and administrative users will be able to schedule appointments for patients, as per these settings from the Portal Manager.
- Enabling Your Patients to Book Appointments
